the choice is yours.
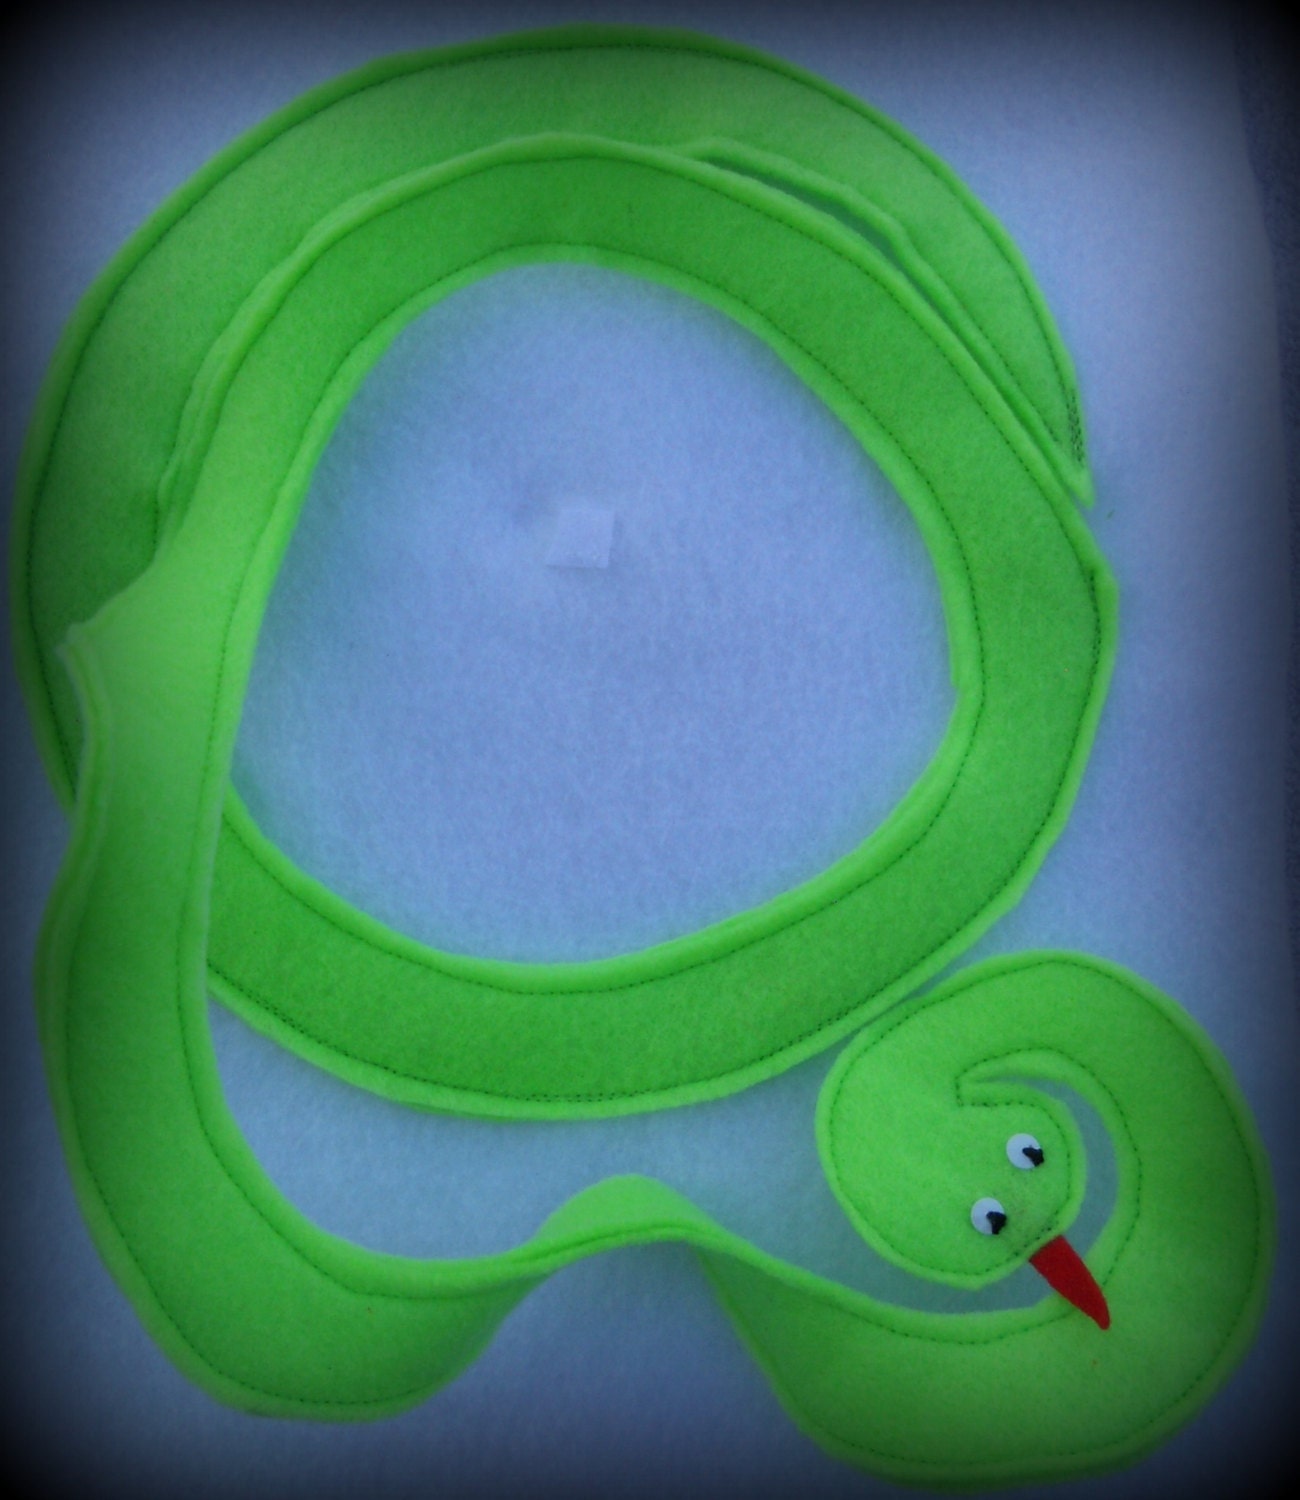
I found a very cute coiled felt snake while searching the internet. He is very basic --- a simple green snake with button eyes and a felt tongue. I love him.

The end of his tail was fastened to the unadorned background page so he could be uncoiled and recoiled.
Since babies like to touch things long before they can actually do them, I like to have a lot of different "feels" on each page.
So, using the basic idea I took it a few steps further.
 |
| My Snake in the Desert Quiet Book Page |
- I added rickrack and sew-on google eyes (I use dental floss or fishing line to sew on eyes, beads, buttons, etc. so there is no chance of them coming loose and creating a choking hazard.)
- I saw a darling alligator page, with a zipper jaw, that had a simple bird perched on the gator's head. I didn't want to do the gator but I loved the bird so here he is!
- I am not sure a ladybug* is a desert dweller but I had some and I thought they were fun.
*I use lots of "foamies" stickers on the pages because there are so many different fun ones BUT
I don't rely on the sticky part (except to hold them in place as a sew around** or over** or through** them).

** Around them with a whip stitch, over the narrow parts with an overcast stitch, or through them as you see the bead spots on the lady bug. (simply clean the needle with rubbing alcohol to remove the sticker substance after you have finished sewing through the foamies.)
Because I am a creative cheapskate I search the thrift shops for things I can use. (sometimes I find something that has me creating a way to use it.) I make it a goal to never pay full price for anything. I always wait for a sale ( the 9x12" felt pieces were on sale for 20 cents each) or use their coupons when I buy something at the expensive craft stores. And, I always check the dollar stores first, followed by the discount stores. The cute little dimensional stickers were just a dollar a package at Wal-Mart ---- and they had many different types. The "foamies" brand stickers above were purchased with a 40 percent off coupon. The large ladybug was from a packet I was given as a gift because my friend knew I loved them.
Because figuring out how to do the snake was a bit challenging I am going to provide
some illustrations and basic instructions.
 |
| Step 1 |
Draw a rough pattern on a piece of white paper. I have a oval crock pot and the lid provided the perfect outer line.
Place a sheet of tracing paper over the original pattern and trace it. (Actually I had to do this 12 times since I am making 12 books.)
Place two different colors of 9x12 felt together and pin the tracing paper pattern on top of the two.
 |
| Step 2 |
Notice I don't center the pattern on the piece of felt because I want as much felt left over as possible to use for other things.
Carefully sew around the outline, around the snake, and then once again, a very short distance away from the first stitching.
When sewing most items to the backing page it is not necessary to match the bobbin thread with the top thread because the bobbin thread will not show. For the snake you want to have the top thread match the top of the snake and the bobbin thread match the color of the belly of the snake, since they will both show.
The two rows of stitching creates the narrow "path" where you cut the snake. Again, carefully, cut along the path between the rows.
When sewing, I leave the mouth area of the head open so I can reach in and sew on the eyes and insert the tongue after the snake is cut out. Then I whip stitch that area closed.
The most tedious part comes after the sewing and cutting! You must tear the paper away. Some comes off in fairly large pieces, some can be scraped off with a fingernail and you may have to use tweezers for the tiny remaining pieces, being careful not to catch the stitching. Be patient ---- they will finally all be gone, I promise.
Next Steps
Coil the snake on the page.
Sew (by machine or hand, your choice) along a portion of the tail to keep him in place.
Sew small pieces of Velcro type hook and loop to the underside of the head and the matching place on the background so the snake will stay coiled during non-play times.
The snake can do more than just coil and uncoil. He can reach out and check out the bird and ladybug. (or I guess pretend to consume them!)
Still I needed more.
I didn't want to leave the area under the snake bare. But, I couldn't decide what I "wanted to be discovered" when the snake was uncoiled. I considered several different things ---- and rejected them.
Until. . .
"foamies" came to the rescue!

Remember back to my first quiet book post when I said there would be ways for Dave to help with this project? He questioned the plain Velcro circle in the middle of the critters (it's matching circle is sewn to the underside of the head to keep the snake coiled). I didn't know what to do with it so, until then, I had chosen to just ignore it.
Thanks to Dave's creativity the circle is now a little turtle.
1 comment:
Very cute! Thanks for sharing.
Beti
Post a Comment