a "been-there" mom of six offers encouragement
to wives, young mothers, and those not so young,
and simple common-sense approaches to
the "ings" of life:
child-rearing (hints and helps), homemaking (all areas),
cooking (simple, cheap, and do-it-yourself)
making (toys and gifts), preparing (for the unexpected),
maintaining (sanity and peace in this increasingly crazy world) and more---
all aspects of making the most of making do on little---
and having fun in the process.

Friday, May 31, 2013

Part 1 - Gain Peace of Mind by Simply Storing Water . . .


The most important thing you will need to have on hand if the bottom were to drop out of everything is drinking water.  While one quart of drinking water a day will sustain life, one gallon of drinking water per day is recommended. 

Estimates vary on how long a person can go without water but the general answer is three days  before there are very serious and cruel side effects.  Much depends on the temperature, the age and health of the individual, and the circumstances.


Begin Today:  Look around for at least one container you can use to store water and do it! 

Heavy plastic bottles like soda pop or juice bottles are great  Just make sure that what the container held originally was safe to eat or drink and they have been washed before reusing.  Empty bleach bottles are the only exception.  You can use well-washed plastic milk jugs if necessary but they will crack in time.


It is recommended that you store a minimum three-day supply of water, per person, but it would be best to have a two-week supply for each family member. 

Number in my family _____ X 3 gallons per person = _______gallons minimum.
Number in my family _____ X 14 gallons per person = _____ gallons preferred.


Continue:  Refilling and storing acceptable containers as you acquire them.

When drinkable water is properly stored it should have an indefinite shelf life. If desired, to maintain the optimum drinking quality of the water, you may choose to refill the containers every six months.

Watch your Progress:  It's that simple to provide water insurance for
your family . .   just in case!

If you want to dive deeper into water storage information, click on the link below to go to my previous post What if you turned on the tap and nothing came out?

http://thecreativecheapskate.blogspot.com/search?q=storing+water

P.S. I love to hear from you, and I respond to all appropriate comments. We are having so many spam problems  we have had all "anonymous" responses blocked.   If you want to contact me please do it personally through our e-mail address, listed in the bar on the right side of the blog.  Thanks for understanding.

Tuesday, May 28, 2013

Simply Preparing for "Just in Case" Brings Peace of Mind

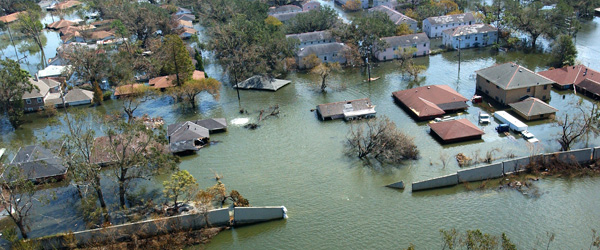
Being the realist that I am, my last post visually reminds us that calamities lurk just around the corner.  Do we want, or tend, to think that it will never be our corner?

Do we feel sincere sorrow for those affected and dismiss the possibility we could be next?

One thing we know for certain is that we never know for certain.

That post also points out the various types of insurance we carry "just in case" a disaster does strike our home, neighborhood, state or country. Having insurance, that we hope and pray we will never need,  brings peace of mind.

This post is an introduction to a series of simple, little or no cost, and quick things we can start doing that will provide peace-of-mind-insurance........ just in case!

Generally, following any widespread disaster it takes emergency resources 72 hours to respond. That could be a very long three days!

Amazingly, we have a relative who has decided  not to prepare because he doesn't know, specifically, what to prepare for. It is that sound thinking?.

While the following is going to sound redundant --- some words just keep repeating over and over and over,        I hope you will keep reading.

If we knew what the trial would be, or what season it might occur, preparing would be a no-brain-er. It's also a no-brain-er to realize that regardless of the what or when----basic needs must be addressed.

Preparing in advance  is the HOW we can meet the basics. Being prepared  (even if not making the difference between life and death) will certainly make our circumstances more bearable.

In case you are wondering, Dave and I are not survivalists or off-the-grid folks. What we are, are just-in-case-ers (practical realists prepared to sustain ourselves if we must live off-the-grid for a few days.)


  • What we all need are basic things to meet our most basic needs to help us carry on.
  • What we all need are basic things we can carry with us if we have to leave our home immediately --- and depend fully on ourselves for a few days.
  • What we we need are basic things to carry us through if we have (the luxury) to shelter in place for a period of time.
And, what we need is to have these basics gathered in one easy-to-grab place . . . JUST IN CASE.


Dave and I (being of advancing age, stamina and mobility) have divided our basics into at-the-ready-grab- and-go "units."

We each have a fully-filled multi-pocket vest, a pair of cargo pants, suspenders, and a utility belt with a variety of hooks/loops, containing the most basic basics.  If we have to flee in a hurry we have what we need to exist for a short period of time. 
                                                                               
   While Dave may not be stylin' no one will be laughing
if the time comes he needs to wear his grab-n-go outfit. 

 We choose to prepare for the worst while hoping  for the best?

If circumstances allow us to take more we each have
  • a backpack 
  • a bucket (that can also be used as a seat or a toilet) with extended supplies 
  increasing the amount of  basics and adding a few extra items.

We also have a sturdy in-use garden wagon that will carry the extras if taking more is a possibility.

In the car we have a grab-and-go-suitcase.

Along with our advancing age (and accompanying memory loss) we know we will be under stress in the best of situations so we have lists that list what is in each.

Getting started ---- just in case!

(Getting started begins simply by doing just that, basically putting one foot in front of the other — taking one step, then another, then another --- towards the peace of mind that preparedness brings.)

Start by thinking about YOUR personal situation (number and ages in family,  medical or other special needs, etc.) and begin to consider and compile a list of your basics.

Future posts will include water, food, hard-copy contact information, loss of utilities (including phones) and all that means in our "computerized" age,  first-aid, and much more.

All simple, quick and at very little or no cost ----
because I am Simply, Gail . . . and I am concerned with your well-being.


Saturday, May 25, 2013

Why are Realists Called Alarmists?

Some of these photos are from happenings from this past week!  
Most within the past 12 months!
Two from 12 years ago.

I-5 bridge collapses north of Seattle

ReutersSavagery: One suspected attacker with a meat cleaver (circled) in hand walks towards his accomplice (also circled) as their victim lies dead in the road
Some global -----  Others Local ----  Many Personal
wildfirejpg.jpg

Most caused by Nature's  unrest ---- 
Some by Mob unrest . . .
Others by Individual unrest 

WPTV Arizona highway cracked

NJ gas lines


National emergencies and local emergencies . . .
that affect many
     that affect some
           that affect one

that might personally affect YOU and your family!

Canadian freight train derails
Protests Spread Across Middle East

There are personal emergencies 
Millions losing jobs. . . 
Hundreds lining up for a limited number 
of available jobs


cfa ER appointments


Then there is the one that changed most everyone in one way or another

Hijacked United Airlines Flight 175, which departed from Boston en route for Los Angeles, is shown in a flight path for the South Tower of the World Trade Towers on Sept, 11, 2001. The North Tower burns after American Airlines Flight 11 crashed into the tower at 8:45 a.m. (Robert Clark/AP/Aurora/Robert Clark/AP/Aurora)People flee lower Manhattan across the Brooklyn Bridge in New York, Tuesday, Sept. 11, 2001, following a terrorist attack on the World Trade Center. (Daniel Shanken/AP/Daniel Shanken/AP)


Emergencies, or in many cases even the prediction of  potential situations, often result in . . .


What if the emergency was one that, while causing no structural or physical damage anywhere, left us without the ability to do little-if-anything anywhere?  Think how a widespread or worldwide power outage would render the "computerized" world helpless!


WHAT IF . . . ?

Most of us have car insurance, home insurance and medical insurance "just in case." 

Life insurance provides for our loved ones after we die.

How much better to have insurance to help us and our loved ones endure any emergency we may encounter.

Does simply being prepared make us a realist   or an alarmist? 


Friday, May 24, 2013

The Old-Age Dilemma AND The Perfect Anti-Aging Cream


When we hit the later years of our life we are faced with an old-age dilemma, which is 

How do we (and others) refer to us?

The options are bleak and none of them are the least bit appealing. We'll start off with over-the-hill, retiree and senior citizen. You can take it from there.

Below are two of the best ways to help us feel (or look) younger--- even when we don't and we aren't.

Attempt #1  Remember the wonderful carefree days of youth, back when there was nothing better than an ice cream cone, crammed full with the creamy stuff, eaten on the hottest day of the summer, leaking from the sides of your mouth, dripping all over your hand, down your arm and onto your clothes?


On-lookers thought we were so cute!


Well . . .


Can there be any anti-aging cream that
works as well to recapture youth
as an ice cream cone?

Attempt #2

Instead of exercising, eating well, dressing in younger styles,  layering all types of make-up, and coloring your hair to cover the tell-tale signs of aging, simply do the following. 

It is amazing, free, foolproof and instant --- convincing others you look great without you doing all the not-so-great things to maintain that image. Actually, without you doing ANYTHING other than this one thing.

I guarantee it!


Tell people you are 10 years older than you actually are!

(I may not look like much at 70 but I am quite presentable for 80!)


Wednesday, May 22, 2013

Make Baby or Toddler Pants from Shirtsleeves


    (You don't have to look too closely to see where I forgot
to tighten the elastic on one leg.)

This week I used a $1.00 thrift shop blouse to make a little one- piece sun-suit for our September-arriving granddaughter.


"What does this have to do with making baby or toddler pants?" you ask.

The blouse had 3/4 length sleeves with band trim across the bottom.  

I simply couldn't let all that sleeve material go to waste. 

Plus, the shape of the sleeve when I cut it from the rest of 
the blouse reminded me of the pattern shape for little pants.
I laid my "pattern" on the sleeves so 
the cuff bands of the blouse became 
the hems of the pants---another time-
saving step.  And I love how the little 
"slit" feature, originally on the cuff, looks
at the bottom of the pants. 

I was really excited when I saw how cute they turned out.

Then I realized I hadn't asked Dave to take before and during photos of the process!

I have tried to recreate it by cutting the sleeves out of a
blouse I had in my closet. It wasn't cotton and had short sleeves so the layout doesn't look quite right but I think it is enough to give you the idea.  
(Oops! I drew the line too close to the leg of the pants. 
Obviously a "do as I say, not as I do" situation!)
Step 1
Fold the sleeve in half. Fold the "pattern" in half and lay it on the sleeve fabric.  Important: Although my photo above does not show it---
you must be sure to allow extra length at the top of the 
pants for the waist band casing. Cut around the pattern allowing extra for the seam.Repeat with second sleeve.  


Next, I copied some illustrations from a baby pants pattern to give the visual direction.


Men's shirts would give you even more fabric to work with.  Since most children grow more in length than they do in "width" the longer sleeves on men's shirts would allow you to make pants for children, not just infants and toddlers.

Denim shirts would provide options of pants from the sleeves and --- skirts, vests, jumpers, shorts and more from the rest of the shirt.  

Now, if they would only make the buttonholes on adult clothing closer together we could utilize that part of the shirt also.  What a time- and effort-saver that would be!

Happy Sewing and Happy Thinking  ... 
of things you can do and things you can make do with.

I am Simply, Gail --- the creative cheapskate!


Friday, May 17, 2013

Simple Dresses from a Bedsheet

In the late 50's and early 60's,                                
(when I was in the shape to wear  them!) 
Belted Sleeveless Pencil Dress
A classic dress
from  a half century ago
simple sheath dresses were in style. 

Times have changed (along with my size and shape) so today, being creative and frugal cheap,  I am going to introduce you to the SHEET dress.

In the mid 60's the tent or trapeze
dress came into fashion. I had this actual pattern (and even in this size).


I have just discovered "vintage" patterns (40s, 50s, 60s) are making a comeback in the pattern books---at about $16.00 each.  A pattern similar to this 50 cent one may be among them.


I like loose dresses for summer wear --- at least around the house.  They may not be cool in the fashion sense but I find them much cooler than pants in the practical sense. 

Sew So . . .

I was at  our local fabric store this past week, hoping to take advantage of their 50-percent-off one-cut-of fabric-coupon.  Ha!  Even at their half-price, the cost per yard was more than double what I was comfortable paying.

My next stops were the thrift shops!

I found a cute full/double size floral patterned sheet for $2.00 and a bright yellow with print border queen set for $3.00. All, while used, in excellent condition with the added bonus of being softened by washing and drying.

There is enough material  in this $5.00 worth of fabric to make
dresses with lots of  left over for other projects! I might use some
to make crib sheets for our  expected granddaughter.
I have a tent-style dress that fits well so I laid it out and drew around it, making my pattern. Besides being cheap I am lazy so I thought creatively and laid out the pattern so the hem of the sheet became the hem of the dress!
Except mu-mu  type, not nightgown type

I have a previous thrift-store-purchased sheet I have been using as a summer tablecloth.  It is bright sea blue with large, also bright, tropical fish. It is about to become a dress also---possibly one with an gathered neck similar to the one shown here.

Flat Sheet Measurements 

(Keep in mind that a yard of fabric, no matter what  width, is 36 inches in length so even a single flat sheet provides a little over 2 yards of 39-inch fabric.)

Sheet for single bed - 39 inches wide by 75 inches long
Sheet for double (also called full size) is 54 inches wide by 75 inches long
Sheet for queen bed is 60 inches by 80 inches
Sheet for king bed is 78 inches by 80 inches

Think what you could make with flannel sheets! Pajamas, Diapers, Crib Sheets and More . . .

Tuesday, May 14, 2013

Healthy Cold Drinks for Hot Days

Our long Winter is finally over 
Our Spring was fleeting 
Summer is in full Blast

Dave volunteers at a horse ranch in the therapy portion of a program for addicted boys. 

Since I have never mentioned horses on this blog before (except for the rocking horse cake which you can find in the cookbook sidebar) I will answer the question before you even ask.  

No, Dave didn't know anything about horses before he started helping out but----he did know a lot about addicts!

He comes home hot and thirsty.  I have been raiding our freezer* for refreshing beverage combinations.

It has been fun coming up with winning combinations on my own --- using what we have on hand.

Fruits Stock Photo

In their seasons, when fruits and vegetables are readily and cheaply available, both from our garden and those of friends,  local farmer's markets or fruit stands,  I  freeze some for future use.  

Our freezer currently contains 

Banana slices -- both very thinly sliced and sliced about 1/3 inch thick. 
Peach and cantaloupe chunks
Watermelon puree
Grapes  
Blueberries
Orange slices
Lemon slices
Raspberries
Tomato puree
Pomegranate seeds
Spinach leaves
Kale leaves
Cilantro-stuffed ice-cubes
Also a variety of green, red and yellow green peppers, zucchini, etc.
Plus a five-pound of pebble ice (the type that is used in meat section displays) that I have divided into 2 cup portions in zip-lock-type freezer bags.

Note: I forgot to add that I usually include one or two large dollops of my simple and foolproof homemade Greek yogurt in each of our drinks.   You can find that recipe here.  http://thecreativecheapskate.blogspot.com/search?q=greek+yogurt

We have just started making full use of our bounty in this way and the possibilities are endless.

Banana slices, cantaloupe chunks, orange slices, apple juice with chia seeds blended in for extra nutrition

Cantaloupe chunks and apple juice, garnished with a few frozen grapes dropped in the glass before serving.

A blender is necessary ---- make sure the lid is on tight! I usually keep a hand on the lid also . . . just in case.

Use whatever combinations and measurements appeal to you.

I look at this next one as an occasional treat that doesn't sound so sugary when the blender full is divided among several glasses.

Lemon Cooler --- Wash one large lemon. Remove a slice from the top and bottom of the lemon and discard. Remove 1/2 to 2/3 of the rind from the lemon and discard it, leaving the rest of the rind intact. Cut lemon into thin rounds and remove seeds. Place slices in blender container. Add 1 cup granulated sugar. Fill container with crushed ice. Add cold water to fill container 3/4 of the way. Put on the lid, holding it firmly in place, and blend on high until smooth. Serve immediately.

My next attempt will be a V-8 (vegetable) type drink.  I imagine (and hope) it will turn out like a gazpacho smoothie!

I offer more simple drinks  under  beverages  in the cookbook sidebar. 


Side note:  44 years ago I wanted a blender for Christmas.  Dave felt it was one of those "things" that would sit on the counter and collect dust but he indulged me.  

'Nother note: It is not necessary to buy one of those $300+ Cadillac models.  Most reasonable blenders will do the job.

'til we eat again,
           I am Simply, Gail ---and I try to keep everything simple